Product History Button in POS Screen
Add a Product History button to the POS header that opens a modal to search products by SKU or name and view their complete history including sales, purchases, stock movements, warranty, and expiry information.
Download
Features
- Search by SKU or Product Name (partial match supported)
- Search by Variation SKU (sub_sku)
- 5 History Tabs:
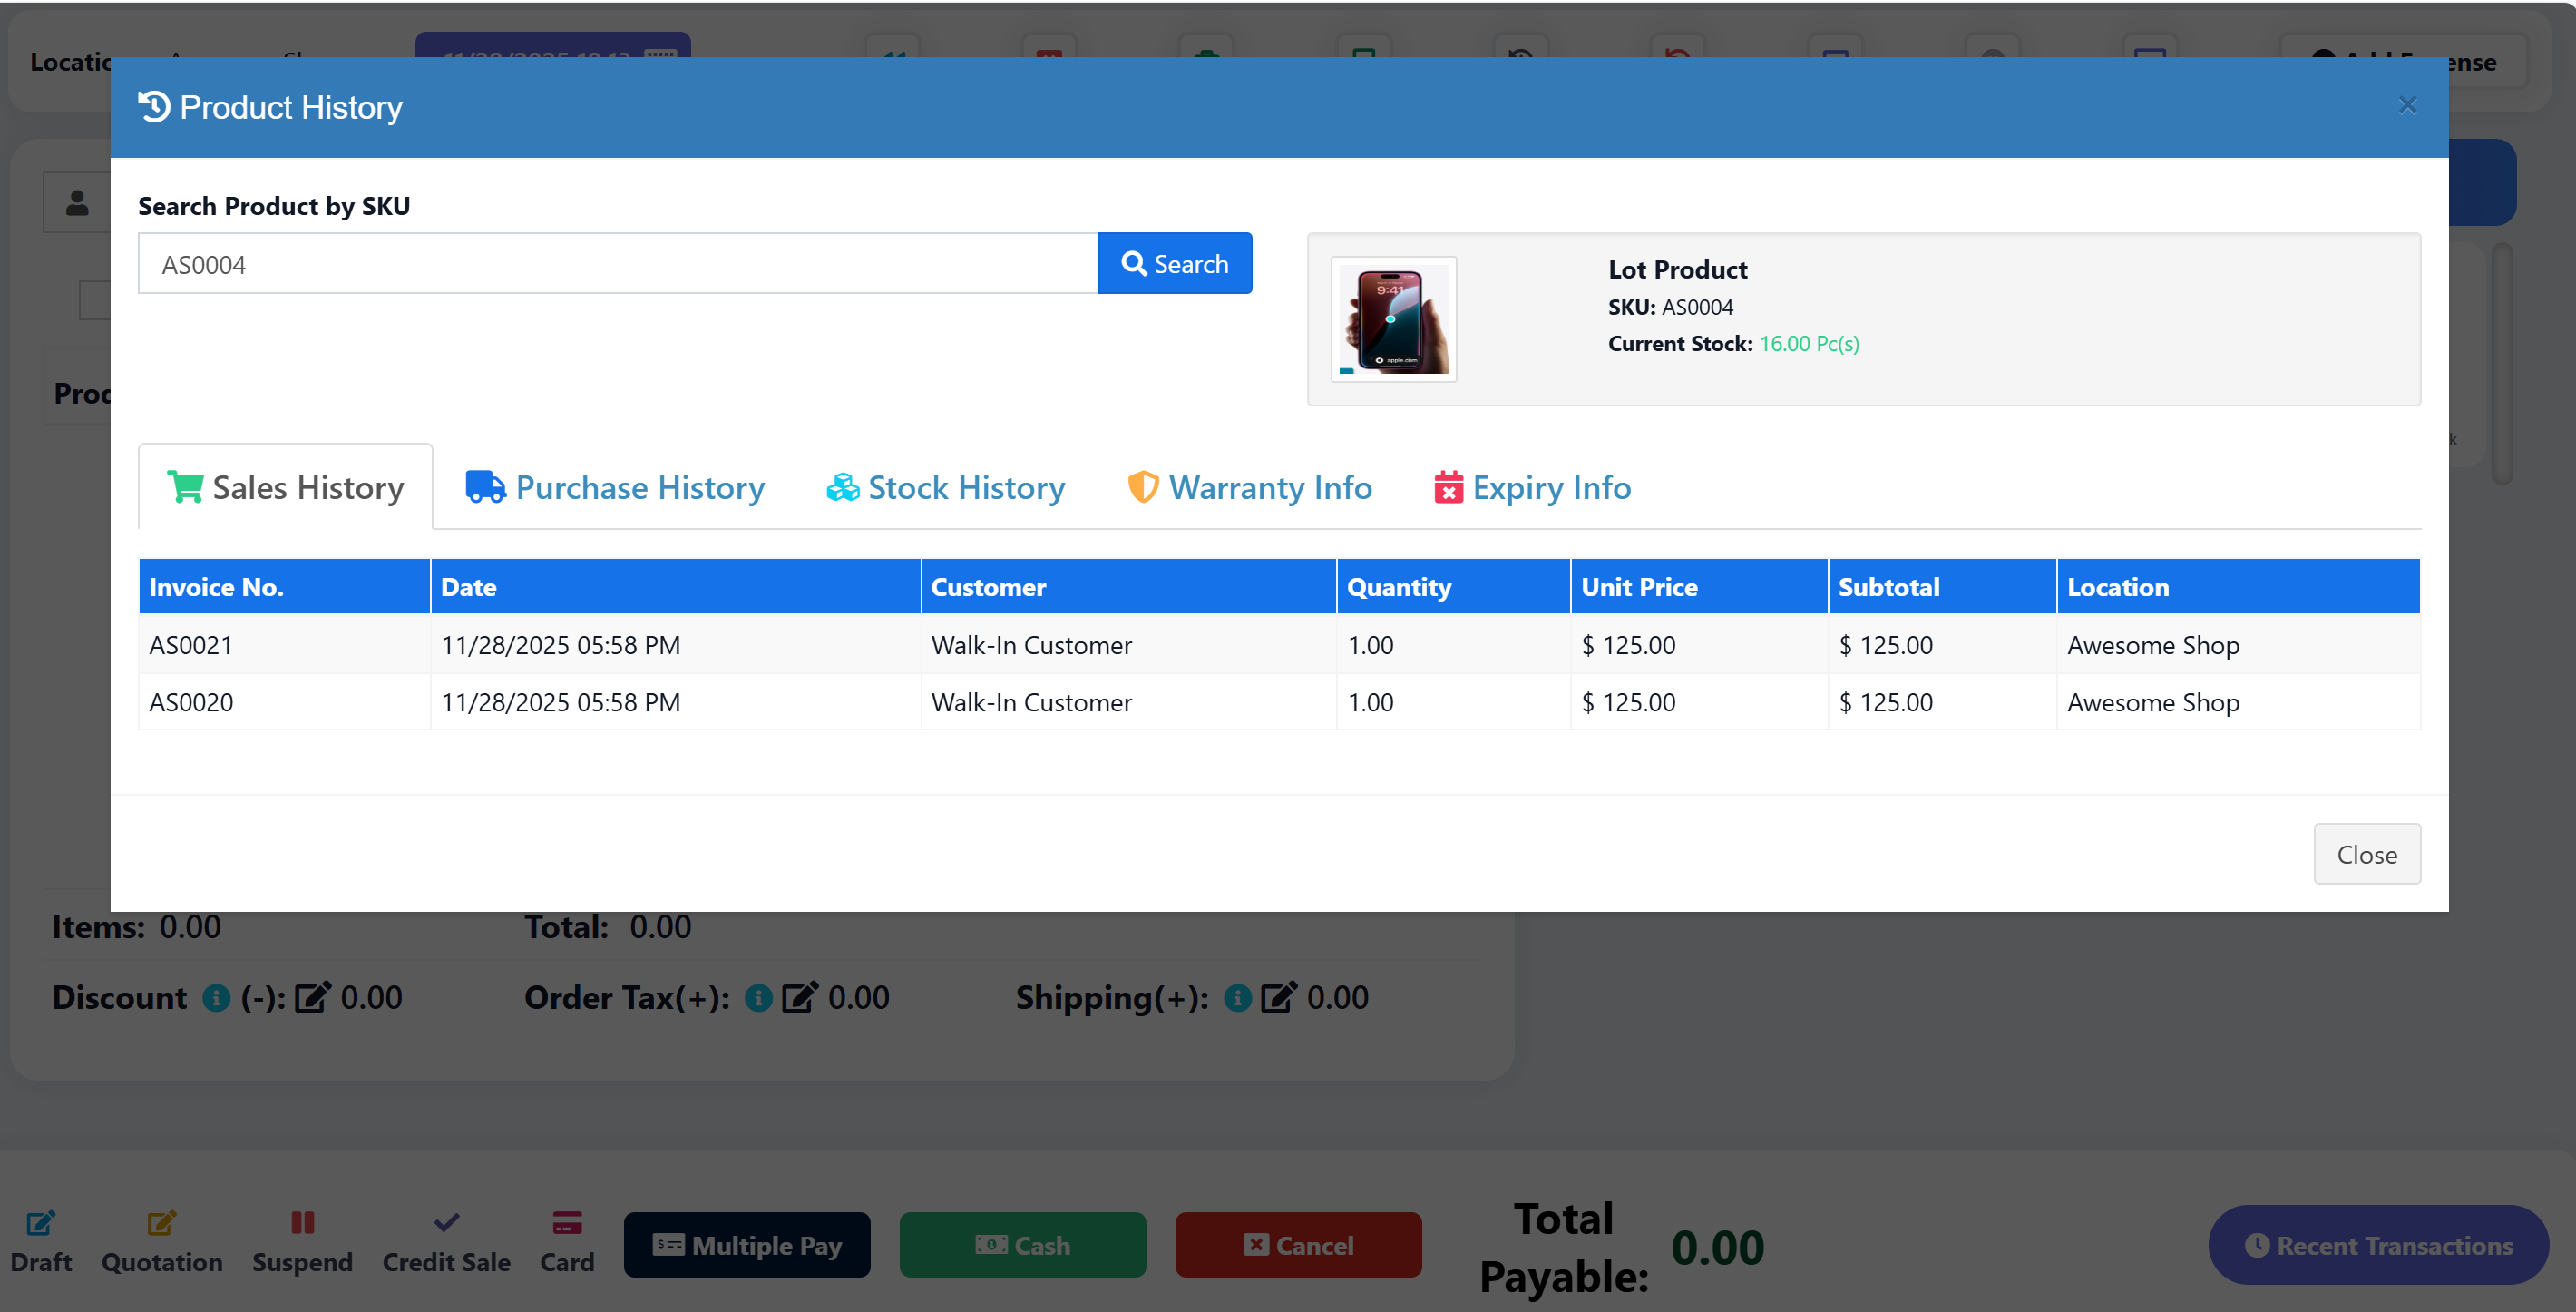
- Sales History - Invoice, date, customer, qty, price, subtotal, location
- Purchase History - Ref no, date, supplier, qty, price, subtotal, location
- Stock History - Date, transaction type, ref, location, qty in/out, balance
- Warranty Info - Invoice, date, customer, warranty details, status (Active/Expired)
- Expiry Info - Lot number, expiry date, location, stock, days to expiry, status
- Pagination - 8 records per page with navigation controls
- Bilingual Support - English and Arabic translations
- Permission-Based Access - Each tab respects user permissions
Permissions
The feature includes permission-based access control for each data section:
| Section | Required Permission |
|---|---|
| Base Access | product.view |
| Sales History | sell.view or direct_sell.view |
| Purchase History | purchase.view |
| Stock History | product.view |
| Warranty Info | sell.view or direct_sell.view |
| Expiry Info | purchase.view |
Users will only see data for tabs they have permission to access. If a user doesn't have the required permission, the tab will show empty data.
Files to Modify/Create
| File | Action |
|---|---|
resources/views/layouts/partials/header-pos.blade.php | Modify |
resources/views/sale_pos/partials/product_history_modal.blade.php | Create |
resources/views/sale_pos/create.blade.php | Modify |
resources/views/sale_pos/edit.blade.php | Modify |
app/Http/Controllers/SellPosController.php | Modify |
routes/web.php | Modify |
public/js/pos.js | Modify |
lang/en/lang_v1.php | Modify |
lang/ar/lang_v1.php | Modify |
Installation Steps
Step 1: Add Button to POS Header
Edit resources/views/layouts/partials/header-pos.blade.php
Find the calculator button and add the product history button after it:
<button type="button" id="product_history_btn" title="{{ __('lang_v1.product_history') }}"
    class="tw-shadow-[rgba(17,_17,_26,_0.1)_0px_0px_16px] tw-bg-white hover:tw-bg-white/60 tw-cursor-pointer tw-border-2 tw-flex tw-items-center tw-justify-center tw-rounded-md md:tw-w-8 tw-w-auto tw-h-8 tw-text-gray-600 pull-right"
    data-toggle="modal" data-target="#product_history_modal">
    <strong class="!tw-m-3">
        <i class="fas fa-history fa-lg tw-text-[#9333EA] !tw-text-sm" aria-hidden="true"></i>
        <span class="tw-inline md:tw-hidden">{{ __('lang_v1.product_history') }}</span>
    </strong>
</button>
Step 2: Create Modal View
Create new file resources/views/sale_pos/partials/product_history_modal.blade.php
Copy the content from: product_history_modal.blade.php
Step 3: Include Modal in POS Pages
Edit resources/views/sale_pos/create.blade.php
Find @include('sale_pos.partials.weighing_scale_modal') and add after it:
@include('sale_pos.partials.product_history_modal')
Edit resources/views/sale_pos/edit.blade.php
Add the same include after @include('sale_pos.partials.weighing_scale_modal'):
@include('sale_pos.partials.product_history_modal')
Step 4: Add Controller Method
Edit app/Http/Controllers/SellPosController.php
Add the getProductHistory method before the closing brace of the class.
Copy the content from: SellPosController_getProductHistory.php
Step 5: Add Route
Edit routes/web.php
Find the line:
Route::get('/sells/pos/get-featured-products/{location_id}', [SellPosController::class, 'getFeaturedProducts']);
Add after it:
Route::get('/sells/pos/get-product-history', [SellPosController::class, 'getProductHistory']);
Step 6: Add JavaScript
Edit public/js/pos.js
Add the JavaScript code at the end of the file.
Copy the content from: pos_product_history.js
Step 7: Add Translations
Edit lang/en/lang_v1.php and lang/ar/lang_v1.php
Add the translations before the closing ];
Copy the content from: lang_v1_translations.php
Usage
- Go to POS screen
- Click the purple history icon button in the header
- Enter product SKU or name in the search box
- Press Enter or click Search
- View history across all tabs (Sales, Purchases, Stock, Warranty, Expiry)
- Use pagination controls to navigate through records
Screenshots
Button Location
The button appears in the POS header with a purple history icon.
Modal View
- Product info displayed at top (image, name, SKU, current stock)
- 5 tabs for different history types
- Pagination at bottom of each table
Customization
Change Records Per Page
Edit SellPosController.php line with $per_page = 8; to change the number of records per page.
Change Button Color
Edit the button class in header-pos.blade.php:
- Current:
tw-text-[#9333EA](purple) - Change to any Tailwind color class
Troubleshooting
Modal Not Opening
- Check if the modal include is added to both
create.blade.phpandedit.blade.php - Clear browser cache and refresh
No Data Showing
- Verify the route is added correctly
- Check browser console for JavaScript errors
- Verify controller method is added
Translations Not Working
- Clear Laravel cache:
php artisan cache:clear - Check translation keys match exactly
💛 Support this project